
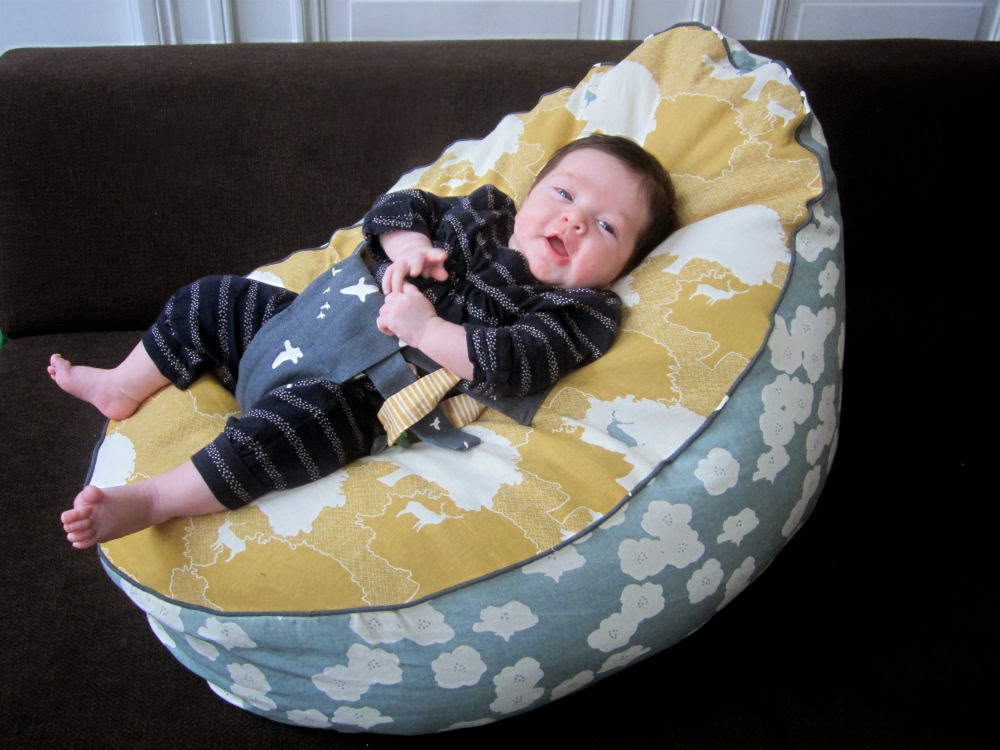
In the past weeks, I’ve been working on the baby and toddler bean bag pattern I wrote about a couple of weeks ago. After making the toddler version for Norah (the bean bag without the straps), I also made a baby version for Ava (same bag, but with straps).
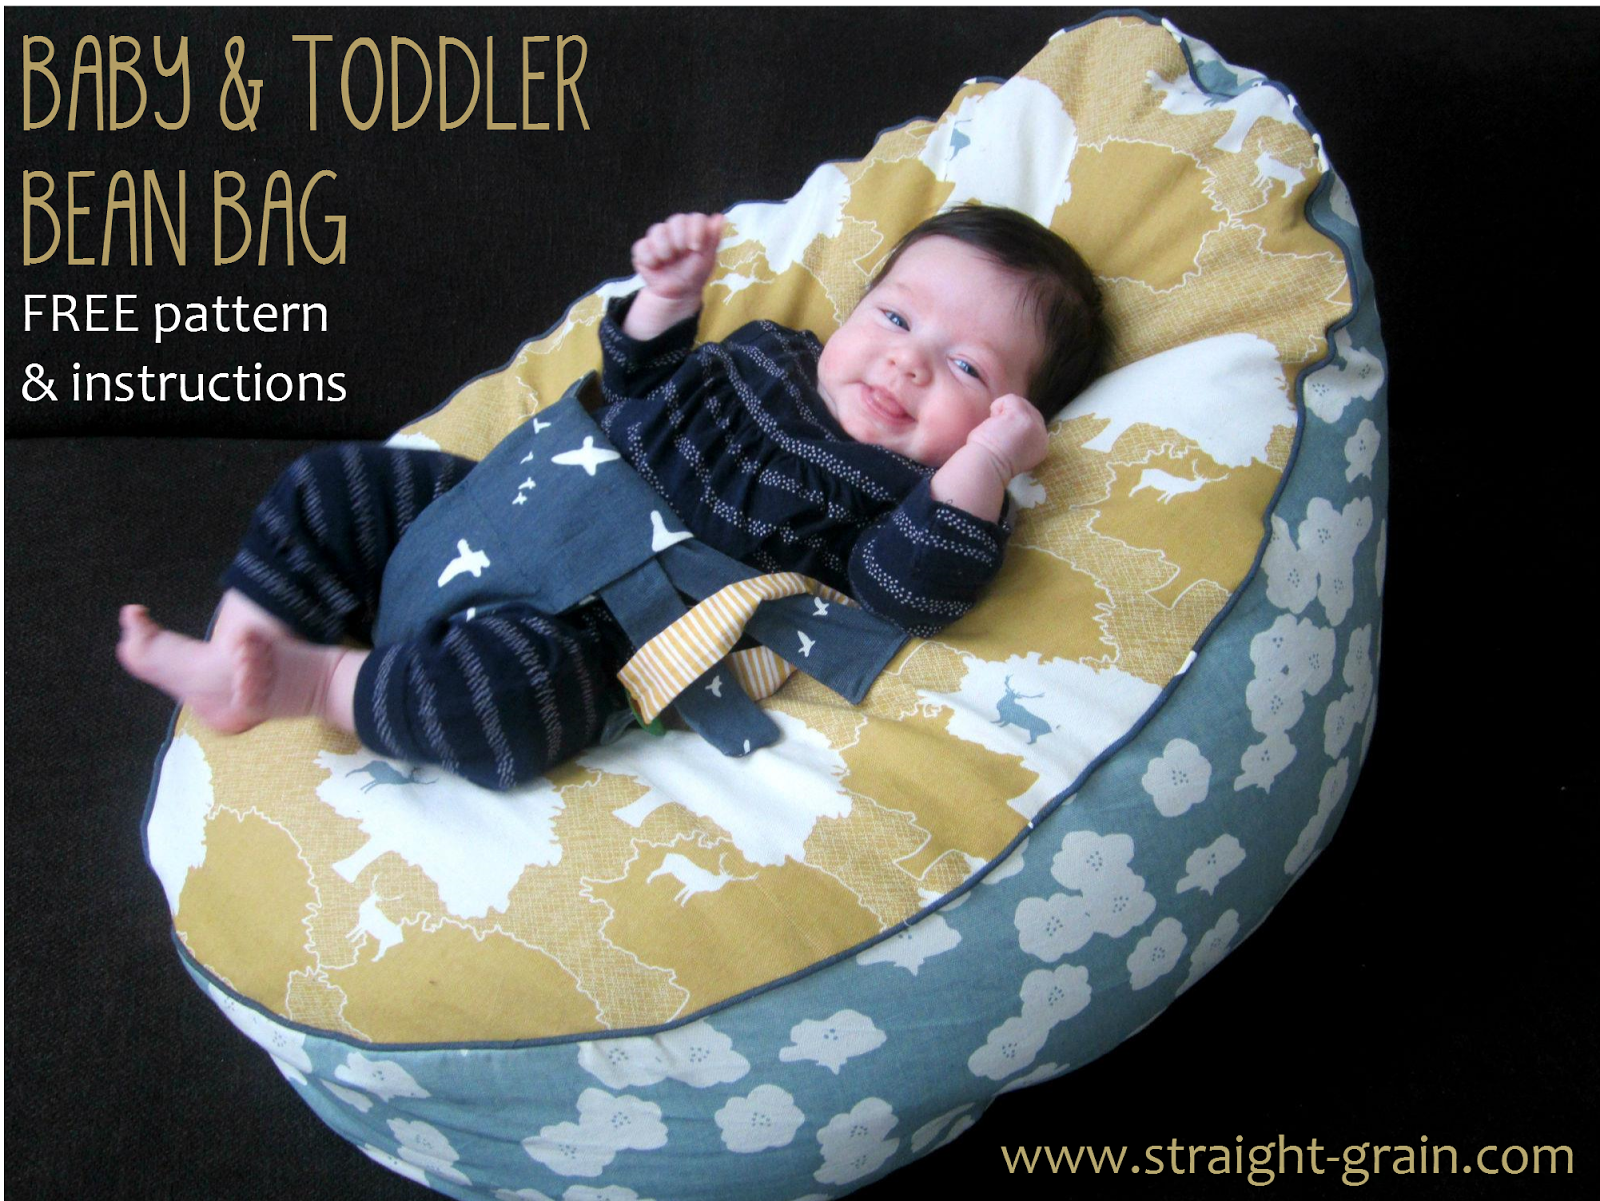
 Do you like the fabrics I used for this bean bag? I sure do! They were a generous gift from Modes4u, a Hong Kong-based webshop which carries a great range of fabrics, including some of my favorite brands and designers (Birch, Monaluna, Echino, Melody Miller, …). I had ordered some hard-to-find Nani Iro fabric from Modes4u a few months ago, and was really happy with their service. So I was quick to say yes to their offer to work together!
It was difficult to choose from such a great selection, but I couldn’t resist picking some Birch prints again. Their beautiful The Grove Decor line is made from organic cotton canvas, a thicker fabric which is perfect for projects like the bean bag.
Make sure to check this blog again next week, when Modes4u will be offering you a chance to win some fabrics here! Yay!
But for now, let’s turn to the bean bag tutorial.
THE DESIGN
The bean bag has a separate inner bag and cover. The cover closes at the bottom with Velcro, so it can be washed. The inner bag is filled with polystyrene beads.
I used piping between the top layer and the sides, but it is purely decorative, not functional, so feel free to leave it out.
IMPORTANT: As applies to any baby chair, you should never EVER leave your child unattended in it! When you notice that your baby is getting too mobile (e.g., erecting him/herself) stop using the seat. Remove the straps and start using it again when your baby is a stable toddler.
PATTERNS
The patterns can be downloaded here (and here they are in just 2 A1-pages). Before you download them, please follow StraightGrain via Facebook, Bloglovin’, email or Pinterest. The patterns can be printed on letter size paper or A4 paper. In either case, make sure that you print it at 100%. Make sure that the option ‘Page Scaling’ is set to ‘None’. Use the 1 inch and 3 cm squares on the first page to check whether you printed correctly.
Very important: seam allowance (1 cm or 3/8″) is already included in the patterns! Do not add extra seam allowance, because the sides and top of the bag will no longer fit (I will spare you the mathematical explanation of this ;-)).
The diagram below shows how to assemble the first nine pages of the pattern. These contain the patterns for the three main parts of the bean bag: the top layer, the bottom layer, and the sides. You can either print these pages once, assemble them, and then trace the different parts, or you can print out the first nine pages three times, and cut out and assemble each part separately.
The inner bean bag and cover share the same patterns for the the top layer and sides. The bottom is slightly different, though, as the cover has an opening in the bottom, while the inside bag does not. It is indicated on the pattern which lines to use for the bottom of the cover, and which ones to use for the bottom of the inner bag.

If you are making the baby bean bag, you also need to print and assemble pages 10 to 12, which contain the pattern pieces for the straps.

MATERIALS
– 1 yard/meter of fabric* for the top of the cover (preferrably heavy weight, or mid weight reinforced with interfacing)
– 1 yard/meter of fabric* for the sides of the cover (preferrably heavy weight, or mid weight reinforced with interfacing)
– 1/2 yard/meter of fabric** for the bottom of the cover (preferrably heavy weight, or mid weight reinforced with interfacing)
– 1.5 yard/meter of fabric** for the inside bag (preferrably heavy weight)
– around 220 cm (86″) of piping (optional)
– 2 strips of around 25 cm (1/4 yard) of Velcro
– around 50 liters (13.20 US gallons) of bean bag filling (polystyrene beads)
* I’m assuming you use quilting width fabric (110cm/44″) for these parts; if you use regular width fabric, you can probably do with less.
** I’m assuming you use regular width fabric (140cm/55″) for these parts; if you use quilting width fabric, you will probably need more.
If you’re making the baby bean bag, you will also need:
– 1/2 yard/meter of fabric for the straps (preferrably heavy weight, or mid weight reinforced with interfacing)
– 1 plastic buckle which fits a 3 cm (1.2″) strap
– 3 small pieces of interfacing (see step 2.7)
INSTRUCTIONS
Note: seam allowances are 1 cm (3/8 inch) unless otherwise indicated
1. Making the bean bag
Note: the seams of this bag can be under a lot of pressure, especially when kids grow bigger. Unless you would like to find polystyrene beads all over your house after a few weeks, keep this in mind as you stitch the seams (e.g., for extra strength, use a smaller stitch length, serge all seams, and/or run a dubble stitch line)
1.1. Put the side pieces with right sides together, and stitch the side seams. Turn right sides out, and press the seam allowances.

1.2. Pin the top layer of the bag onto the sides of the bag, right sides together, and stitch all the way around.

1.3. Pin the bottom layer of the bag onto the sides of the bag, right sides together, and stitch all the way around, leaving a hole of 15 to 20 cm (6 to 8 inch) to fill the bag. Turn right side out.

1.4. Fill the bag with the polystyrene beads. Make sure not to put in too much – your child should be able to sit IN the bag, not on top of it!

1.5. Close the hole. I first closed it with some rough stitches by hand so the beads would stay inside, and next used my machine for a more solid stitch.
2. Making and attaching the straps (not relevant for the toddler bean bag)
IMPORTANT NOTE: Safety first! These straps will be preventing your baby from falling off the bean bag, so make sure to make very solid stitch lines. Use quality thread, a smaller stitch length, a double (or triple) stitch line, and backstitch well!
2.1. For each of the three straps, put both parts with right sides together, and stitch as indicated on the picture below.

2.2. Trim the corners, turn right sides out, and press carefully.

2.3. Each of the three straps has an open side. Fold the end inwards by 1 cm (3/8″) and press.

2.4. Bottom strap: Fold over the top part by 7,5 cm (3 inch) and stitch near the edge.

2.5. Short strap: Insert the short strap into the fixed part of the buckle and fold over by 2 cm (3/4″). Stitch near the edge.

2.6. Long strap: Insert the strap into the adjustable part of the buckle. No stitching is needed here.
2.7. Next, we’ll stitch the straps onto the top layer of the bean bag cover. Use the markings on the pattern to position the straps. First, reinforce the back of the fabric in these three locations with a small strip of interfacing. Next, stitch the straps onto the cover as indicated on the picture below. Keep in mind the safety instructions mentioned at the beginning of this section (use at least three stitch lines, backstitch extensively, etcetera).

3. Making the cover of the bean bag
3.1. Repeat step 1.1 for the cover (put the side pieces with the right sides together, and stitch the side seams. Turn right sides out, and press the seam allowances).
3.2. If you’re using piping, sew it on the right side of the top layer. Your stitch line should be at 1 cm (3/8″) from the edge, all the way around.

3.2. Pin the top layer of the cover onto the sides, right sides together. Next, turn it upside down (not inside out), and stitch right into the line you stitched in the previous step, all the way around. This will make sure that the piping is exactly where it should be.

3.4. Next, we’ll turn to the bottom of the cover. Take one of the bottom pieces, fold in the straight edge by 1 cm (3/8″) and press. Again fold in again by 1 cm (3/8″), press, and stitch. Repeat for the other piece.


IMPORTANT: As applies to any baby chair, you should never EVER leave your child unattended in it! When you notice that your baby is getting too mobile (e.g., erecting him/herself) stop using the seat. Remove the straps and start using it again when your baby is a stable toddler.


